Different Rights Team Shares General
With team shares, users can collaborate within the same folders. You can create different team shares for each department or for projects, so that subscribers can collaborate on the same files and folders.
To improve the collaboration process, subscribers can now be given different rights within those Team Shares. These rights can be assigned at the group level or to individual users.
Roles
The following rights can be assigned to each user or group:
- The Co-Owner has full control over the team share. This role is the best option for administrators.
- The Collaborator (Default) has the ability to seamlessly collaborate with others by generating links. Can edit everything locally and via the web browser. This role is the best option for team leaders and project managers.
- The Editor is similar to the "Collaborator", but without the ability to generate links. This role is the best option for individual users who need to collaborate or edit content locally and on the internet.
- The Web Editor is similar to the Editor, but without the ability to download or synchronize content locally (Sync Tool App). Web editors can only edit content within the Online Web Editor. This role is the best option for users who need to collaborate with users outside the organization.
- The Viewer has limited rights, allowing these users only the ability to view content. This role is the best option for individual contributors who need to view content locally or on the internet but do not need to edit content.
- The Previewer only allows users to preview content in the web browser. This role is the best option for publishing content externally for the public on the internet.
- The Uploader only provides users with the ability to view folder structures (not files) and upload files and folders to the web. This role is the best option if you only need to receive user content.
Powers per Role described
The following table describes each authorization type.
Item (Files or folder)
Owner: Can change the permission of the file or folder
Trim: Can delete revisions of the file or folder
Purge: Can permanently delete the file or folder
Delete: Can delete a folder or file
Share: Can share a file
Sync: Can sync files to devices
File
View: Can preview the file via the web browser (cannot download or print)
Print: Can print
Read: Can download files and synchronize to devices
Write: Can edit the file
Web Edit: Can edit the file only via the web browser
Folder
List: Can view the list of contents in a folder (does not have access to the displayed files)
Create: Can create a folder or file in this folder
Delete: Can delete files and folders
Assigning team share rights
This is how you give users different rights:
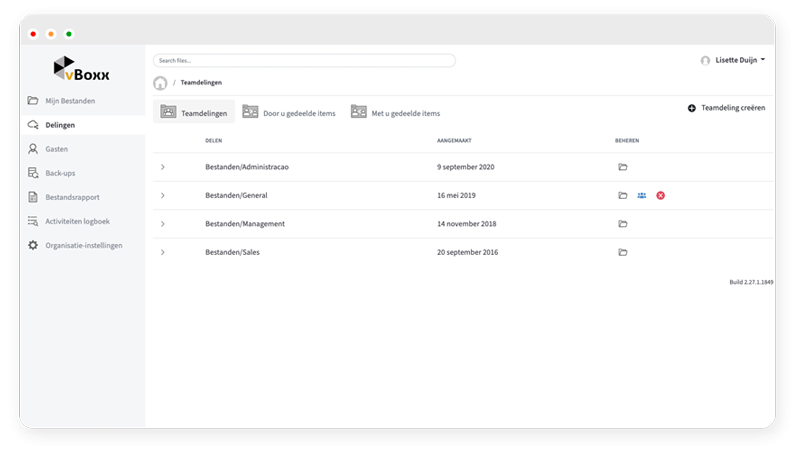
1. Go to the organization where the team share was created.
2. Click within the organization on the tab "Shares". All team shares are now displayed.
3. Click the button (+) Create Team Share to create a new team share. You can also update an existing Team Share by clicking on the Subscriber (figures) button
4. Use the Subscribers section checkboxes (left) to select the users or groups who need access to the Team Share. Note that when you select an entire group, all members of that group are automatically added.
5. After selecting the desired groups and users, use the Permission column to assign the rights.
A. By default, each selected subscriber is assigned the Employee rights. Click the Employee button to edit the user's rights.
6. Select the appropriate rights for the user.
7. Click the Save button to save your changes.
Assign Team Share rights when creating a user
You can also assign rights when adding individual users.
1. Select the organization in the menu where you want to create the user.
2. Click on the Accounts tab. The Accounts page is displayed.
3. On the Accounts page, click the "Create Account" (+) button.
4. In the Subscribe to Team Shares section, select the correct team share to which the user should have access. You can use the search box to search for Team Shares.
5. Use within the same section the column "Permission" to assign rights for this user.
6. Click the Save button to save your changes.
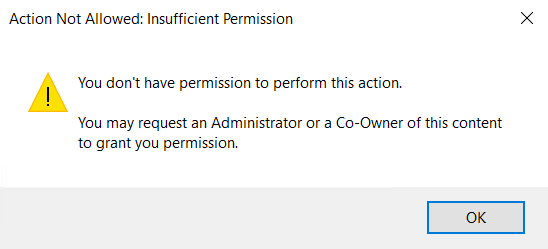
When a user works from the desktop client but does not have edit rights, an error message is displayed.
In some cases, a user may encounter a synchronization warning.
Here's how to resolve such a warning:
1. When a problem occurs, the user sees the "Resolve synchronization status" icon (orange exclamation mark).

2. Click on the icon in the system tray and select the Synchronize Warnings button.
The "Preferences" dialog appears and displays the "Warnings" tab. An error related to the rights is displayed.
3. Click "Resolve" for more information about the warning. A pop-up window appears with an explanation of the warning.

4. Click the "Delete" button to remove the copy without saving the changes.